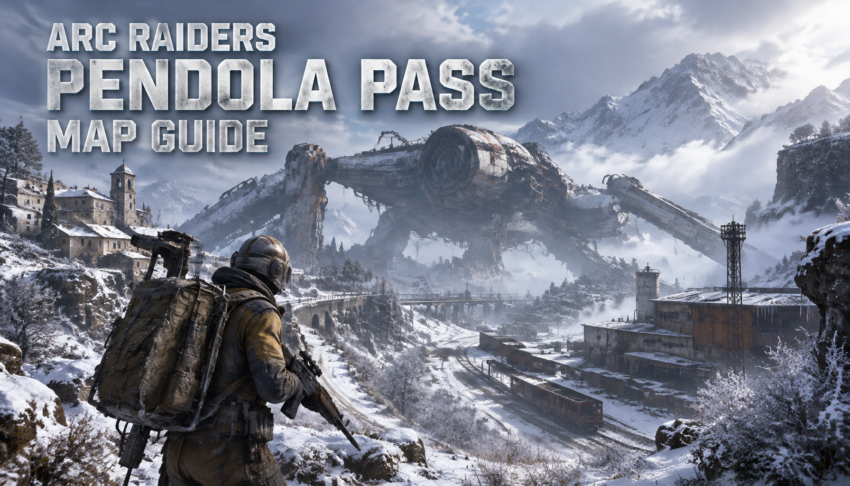
Pendola Pass does not have one loot route that stays optimal every raid. Dynamic Loot Zones can change the value of an area, Flash Freeze can force you indoors, and Redirection can turn a normal scavenging run into preparation for the Fallen Emperor. If you’re farming ARC Raiders Coins, crafting materials, quest items, or Emperor progression gear, the best approach is to set one objective at spawn and extract once that objective is complete.
The Fallen Emperor is the map’s biggest landmark, but rushing there every deployment is rarely the right play. Learn the compact loot areas first, use the active map condition to decide where to go, and save dedicated Emperor runs for when you have the required access item.
What Makes Pendola Pass Different
Pendola Pass was added with the Frozen Trail update and mixes dense settlements, industrial areas, elevated facilities, open snowfields, and major ARC objectives. Unlike a static farming map, it uses Dynamic Loot Zones as a trial system, so the value of an area can change between raids.
That changes the basic farming logic. Instead of memorizing a single high-value circuit, learn several short routes and switch between them based on spawn position, loot quality, weather, PvP pressure, and your extraction options.
Pick Your Objective Before Moving
Use the first moments of the raid to decide what kind of run you’re actually playing:
- General loot run: Stay around compact POIs that match your spawn.
- Quest run: Take the shortest practical route through the required objectives.
- Flash Freeze: Keep buildings or Avalanche Shelters within reach.
- Redirection: Focus on Emperor-related progression instead of ordinary containers.
- Emperor run: Carry the Gateway Conduit and make reaching the wreck your main objective.
- Frigate run: Preserve your resources for the Frigate rather than taking every fight along the way.
Changing that objective halfway through the map is fine when conditions demand it. What usually gets Raiders killed is adding a second major objective after the first one has already succeeded.
Old Town or Railyard: Where Should You Loot First?
There is no universal answer because spawn position and Dynamic Loot Zones matter. Old Town and the Railyard are useful for different reasons, so choose the one that gives you the better short rotation rather than crossing the map for a familiar POI.
| Area | Best Use | Main Risk |
| Old Town | Building-to-building scavenging | Close-range PvP angles |
| Railyard | Concentrated industrial looting | High player and ARC activity |
| Commissary Supermarket | Interior scavenging and cover | Enclosed fights |
| Cielo Sereno Observatory | Northern route and specialized loot opportunities | Longer commitment to a major POI |
Old Town Rewards Fast Building Clears
Old Town has enough interiors and cover to support a compact scavenging route. Enter from the side closest to your spawn, clear the immediate angles, search a small group of buildings, and reassess before moving deeper.
Don’t clear every room just because it exists. Doors, windows, and connected structures let enemy Raiders close distance quickly, so spending too long inside the district gives other players time to approach your position.
A safer Old Town loop is:
- Enter through the nearest edge of the district.
- Clear immediate player and ARC threats.
- Search a small cluster of nearby buildings.
- Check your inventory before crossing into another block.
- Rotate or extract once you have the materials you need.
The last step matters most. Pendola Pass rewards successful extraction, not the number of unopened containers you managed to pass.
Use the Railyard as a Short Industrial Stop
The Railyard and Freight Terminal concentrate multiple searchable areas into a relatively compact part of the map. This makes them useful when your spawn already favors that side and you want industrial scavenging without a long cross-map rotation.
The same concentration creates competition. Gunfire, ARC combat, and repeated container interactions can reveal that someone is working through the area.
Treat the Railyard as a checkpoint rather than a full-clear requirement. Search the structures that make sense for your current route, then move before another squad has enough time to cut off your exit.
Flash Freeze Changes the Safe Route
Flash Freeze can arrive during a Pendola Pass raid and makes remaining outdoors dangerous. When the warning begins, stop judging routes by distance alone and start judging them by access to cover.
Avalanche Shelters provide protection from the cold and can contain loot, but they also create natural meeting points because other Raiders need shelter too.
When Flash Freeze begins:
- Stop starting long rotations across open snow.
- Identify the nearest building or Avalanche Shelter.
- Check entrances before committing to a shelter.
- Wait for a safer movement window instead of forcing the original route.
- If you’re already carrying important loot, consider turning the weather change into your cue to extract.
A shelter solves the environmental problem. It does not solve the PvP problem.
Where to Find the Fallen Emperor
The Fallen Emperor lies around the Almatera section of Pendola Pass, near locations such as Old Town, Almatera Station, and Piazza della Rupe. The machine is enormous enough to serve as a visual reference while moving through the central-western portion of the map.
You will interact with the wreck before you’re ready to enter it. Celeste’s Sizing Things Up quest sends you to several Emperor-related locations and is a useful way to learn the surrounding terrain.
Sizing Things Up Route
The quest includes objectives around different sections of the Emperor. Among the available tasks are photographing a leg from the bridge east of Old Town and analyzing an exposed section around another leg near Railroad Junction.
Later objectives take you to the base of the Emperor and the Buried Harvester Payload. Search the payload and recover the ARC Conductive Coupler, then protect it during extraction.
Don’t confuse this quest objective with Emperor dungeon access. You can complete the Buried Harvester Payload portion without opening the Fallen Emperor.
If the Coupler is the reason for your raid, continuing toward unrelated high-risk loot after obtaining it only creates another chance to lose your progress.
How to Get an Emperor Gateway Conduit
The Fallen Emperor cannot be opened by simply reaching the wreck. You need an Emperor Gateway Conduit, and building one requires materials connected to the Redirection map condition.
During Redirection, active Emperor-related structures provide the route toward Harvester Payloads. These payloads can supply the blueprint and specialized Couplers needed for the Conduit.
Gateway Conduit Requirements
After learning the blueprint, craft the Conduit at Workbench Level 1 with:
- 1 ARC Conductive Coupler
- 1 ARC Insulated Coupler
- 1 ARC Plated Coupler
You also need the Emperor Gateway Conduit Blueprint before you can craft it normally.
Redirection Farming Loop
Use a Redirection deployment specifically for access progression:
Find an active Damaged Emperor Relay
Interact with the relevant relay and obtain the Emperor Beacon.
Deploy the Emperor Beacon
Move into a suitable open area and use the Beacon to call down a Harvester Payload.
Loot the main payload
Search it for the Gateway Conduit Blueprint and the three types of ARC Coupler.
Protect missing components
Once you find a blueprint or Coupler you still need, that item becomes more important than ordinary scavenging.
Extract and craft
Learn the blueprint after returning safely, then use one of each Coupler to craft the Emperor Gateway Conduit.
You may need multiple Redirection runs because the payload does not guarantee that every required item will appear together. Build the set over successful extractions instead of risking collected components for one more event.
Don’t Turn a Gateway Conduit Run Into a Loot Run
Once you have crafted the Conduit, your next Pendola Pass deployment should have a much narrower objective: reach the Fallen Emperor and open it.
Avoid starting with a distant Old Town or Railyard farming loop unless those locations naturally sit on your safe route. Every unrelated fight creates a chance to lose the access item before you reach the dungeon.
Before Entering the Emperor
Prepare for an enclosed high-risk run rather than ordinary surface scavenging:
- Leave enough inventory space for Emperor loot.
- Bring healing and utility appropriate for a difficult PvPvE run.
- Avoid arriving after wasting resources on unnecessary surface fights.
- Keep your Safe Pocket available for a high-priority reward when possible.
- Enter only when you have enough raid time left to deal with the interior and extraction.
This is one of the places where preparation has more value than squeezing extra surface loot into the same deployment.
What to Expect Inside the Fallen Emperor
The Emperor is an enclosed challenge with environmental hazards, defensive systems, and ARC encounters. Parts of its internal trial sequence can vary, so memorizing one exact room order is less reliable than learning how to identify each hazard.
Known sections can involve lasers, crushing hazards, turrets, and other environmental obstacles. Yellow nodes also appear as interactive or destructible elements during parts of the interior.
The safest rule for an unfamiliar room is simple: read the room before moving through it.
Rushing forward can turn an avoidable hazard into lost healing or a failed run. Observe moving machinery, identify defensive systems, and look for environmental elements that affect progression before committing.
Emperor Modulator Should Be Your Priority
The Emperor Modulator is one of the main progression rewards tied to the Emperor. You need one as part of the upgrade to Gunsmith Level 4, which is connected to Frozen Trail’s Amplified Weapon progression.
The Modulator is found inside the Emperor rather than from the outdoor Redirection payload used to gather your Gateway Conduit materials. Finding one is not guaranteed on every run, so reaching the dungeon does not automatically complete this progression step.
Once you obtain an Emperor Modulator, stop treating the deployment as a general loot run.
Loot Priority After Finding a Modulator
- Emperor Modulator
- Other progression items you specifically need
- High-value loot already on your exit route
- Optional containers
- Distant POI detours
Secure the Modulator in your Safe Pocket when possible. A successful extraction advances your workshop progression; another optional container usually does not justify putting that at risk.
When Should You Extract?
The best extraction timing on Pendola Pass depends on what you entered the raid to accomplish.
If you’re farming: Leave after a compact route produces enough useful materials.
If you’re questing: Extract after securing the objective item instead of adding another POI.
If you’re farming Redirection: Leave when you obtain a missing Conduit component or blueprint.
If you’re inside the Emperor: Prioritize extraction once you secure the Modulator or another hard-to-replace progression reward.
This is also where loadout efficiency matters. Players who choose to buy ARC Raiders Items as an optional way to prepare equipment still benefit more from disciplined routing than from carrying unnecessary gear into every deployment. Equipment can improve your options in a fight, but it cannot make a bad rotation or late extraction risk-free.
A Reliable Pendola Pass Progression Route
Don’t try to complete the entire map in one deployment. Build progression across several focused raids instead:
General Loot
Learn Old Town, the Railyard, nearby cover, and your Gondola extraction options.
Sizing Things Up
Use Celeste’s quest to learn the terrain around the Fallen Emperor and recover the required Conductive Coupler.
Redirection
Farm Harvester Payloads until you have the Emperor Gateway Conduit Blueprint and all three required Couplers.
Gateway Conduit
Craft the access item at Workbench Level 1 and save it for a dedicated Emperor attempt.
Fallen Emperor
Enter with enough resources and inventory space to deal with the interior rather than arriving after an extended surface loot run.
Emperor Modulator
Secure the Modulator when it drops, protect it immediately, and make extraction your priority.
That sequence removes much of the unnecessary risk from Pendola Pass. For ordinary farming, run compact POIs and respond to Dynamic Loot Zones rather than chasing a fixed circuit. For Emperor progression, separate Redirection farming from the actual dungeon attempt. The map becomes far more consistent once each deployment has one job and you stop adding new objectives after that job is finished.